
Note: You may not need to manually upload ERP transactions if you have an API integration set up between Vividly and your ERP system.
Tip: Before you start, decide how you will upload your transactions:
- Lump sum by check (recommended):
Enter the total sum amount of all deductions/repayments from a check remittance. This simplifies credit memo creation in your ERP and enables automation and grouping. - Individual one-to-one entries:
Enter each deduction or repayment as its own transaction line. This may align with existing ERP workflows but increases transaction volume.
Note: While Vividly supports both methods, DRM is optimized for the lump sum approach and includes additional automation. If using the lump sum method, it’s important to align your ERP process as well—your transactions in Vividly should match your credit memos.
Step 1: Access the Upload Interface
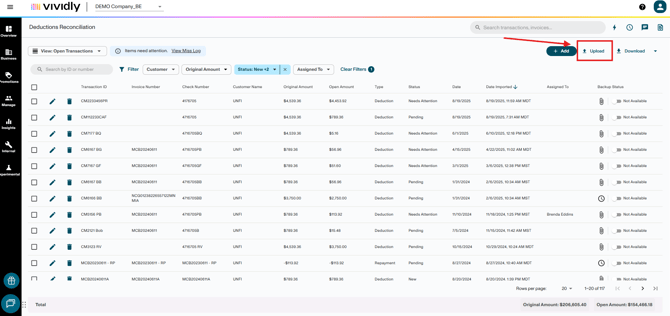
- Go to Business → Deductions Reconciliation 2.0
- Click the Upload button to open the ERP Transaction Uploader
Step 2: Prepare Your Data
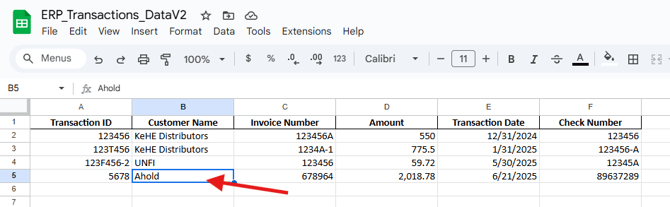
You can use Vividly's template (download sample file) and manually populate the data, or you can generate a report from your ERP with the required fields and map the columns. You'll need these required fields from your accounting system:
- Transaction ID (unique identifier—e.g., Credit Memo number from your ERP system)
- Customer Name (First Receiver/paying customer)
- Invoice Number (Optional: Only use if uploading at the individual deduction invoice-level)
- Amount (lump sum-level OR individual deduction invoice-level; enter a positive value for deductions, negative for repayments)
- Transaction Date (should match the date in your ERP system)
- Check Number (optional only if not using the lump sum method, but recommended to auto-sync backup files)

Callout: For the Amount field, enter positive values for deductions and negative values for repayments.
There is also a setting available to reverse this behavior for uploads if your ERP reports use the opposite sign convention.
Step 3: Upload Your File
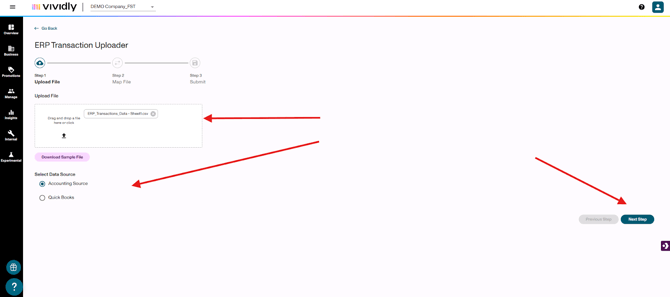
- Either drag and drop your file into the upload area, or click the arrow to browse for it
- Select your data source (either Accounting Source or your ERP system if it’s present)
- Click Next
Step 4: Field Mapping (One-Time Setup)
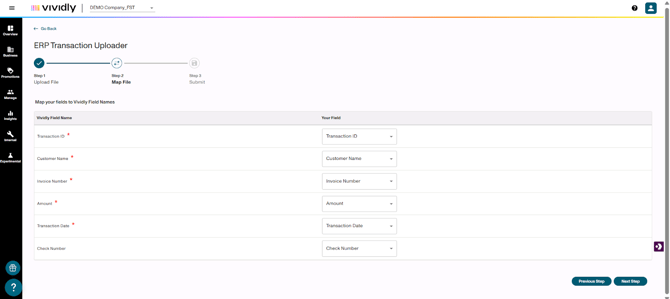
- Map your file's column headers to Vividly's field names
- This mapping is saved for future uploads
Step 5: Review and Complete
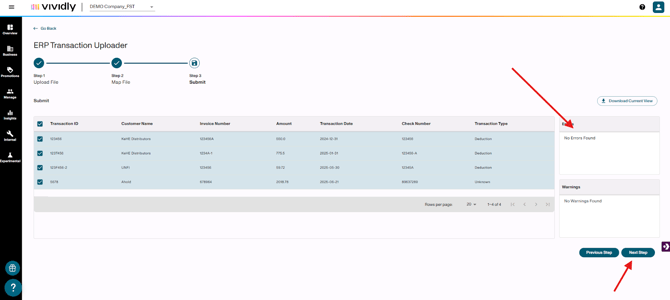
- Preview the deductions to be uploaded
- Fix any errors (highlighted in red)
- The most common error is an unmapped customer name. To fix this, go to Manage → Customers and add the Customer Name you are uploading as an Alternative Name in the Customer Profile.
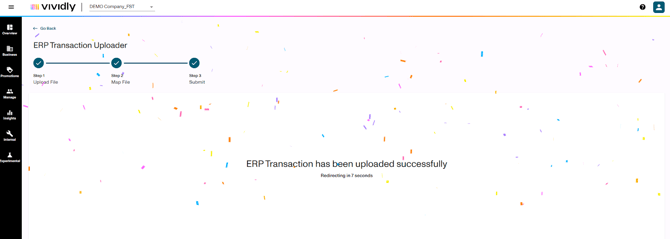
- Click Finish to complete the upload
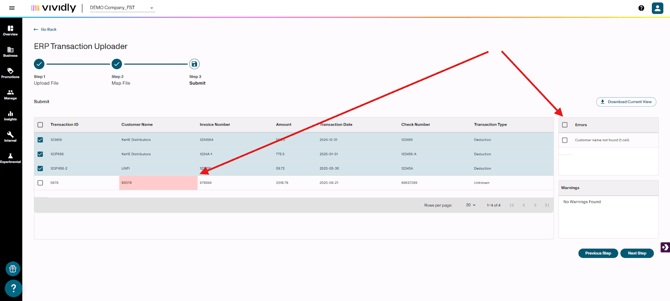
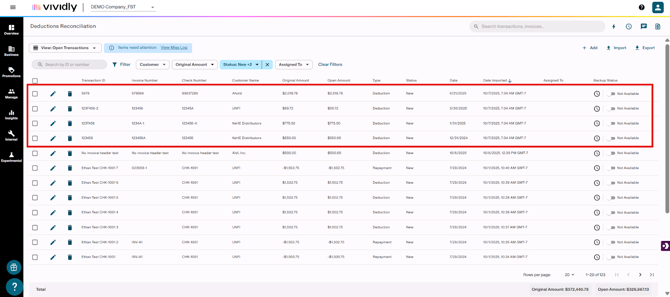
The uploaded deductions will appear in "New" status and be ready for processing and matching with backup documentation.